In the world of confectionery, few delights marry simplicity and elegance quite like the humble sugar cookie. Yet, beneath its crisp, buttery surface lies a canvas brimming with artistic potential-a sweet blank slate awaiting the touch of a creative hand. Welcome to the enchanting realm of sugar cookie decorating, where flour and sugar transform into edible masterpieces. “sweet Artistry: Mastering the Magic of Sugar Cookie Decorating” invites you on a journey through the techniques, tips, and inspirations that elevate cookie decorating from a casual pastime to a captivating craft. Whether you’re a beginner eager to learn or a seasoned baker seeking new flair, this exploration will unlock the secrets behind those perfectly piped details, vivid colors, and dazzling designs that turn simple treats into irresistible works of edible art.
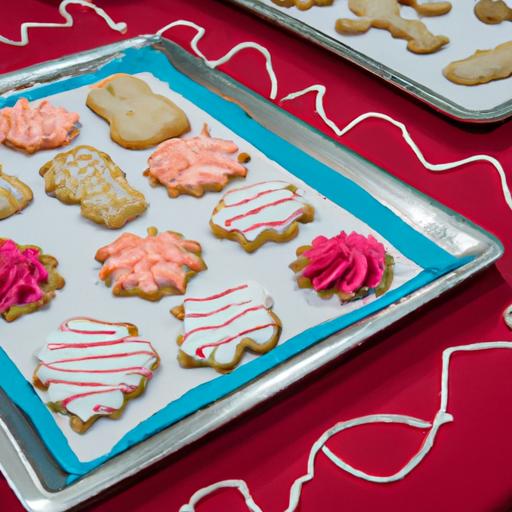
Sweet artistry shines brightest when crafting the perfectly soft and flavorful sugar cookies that melt in your mouth, crowned with crisp edges and seamless, vibrant icing. This beloved treat traces back centuries as a festive favorite, yet it’s the personal touch-the subtle balance of ingredients and expert techniques-that transforms simple sugar cookies into edible masterpieces.
Prep and Cook Time
Prep time: 20 minutes | Chill: 1 hour | Cook Time: 10-12 minutes
Yield
Approximately 24 medium-sized cookies
Difficulty Level
Medium
The Essential Ingredients for Perfectly Soft and Flavorful Sugar Cookies
- 2 ½ cups all-purpose flour, sifted
- 1 tsp baking powder
- ¼ tsp fine sea salt
- ¾ cup unsalted butter, softened to room temperature
- 1 cup granulated sugar
- 1 large egg, at room temperature
- 2 tsp pure vanilla extract
- 1 tbsp whole milk
Instructions
- whisk together the flour, baking powder, and sea salt in a medium bowl. Set aside for easy folding later.
- Using a stand mixer fitted with a paddle attachment, cream the softened butter and sugar on medium speed until light and fluffy, about 3 minutes. This aeration is key for soft cookies.
- Add the egg, vanilla extract, and milk to the butter mixture, beating just until combined to maintain a tender crumb.
- Slowly incorporate the dry ingredients in two additions, mixing on low speed until the dough just comes together. avoid overmixing to keep cookies soft.
- wrap the dough in plastic and chill for at least 1 hour or overnight.This chilling solidifies the butter and enhances flavor while preventing excessive spreading in the oven.
- Preheat your oven to 350°F (175°C). Line baking sheets with parchment paper.
- On a lightly floured surface, roll the dough to ¼-inch thickness. Use cookie cutters dipped in flour to create clean shapes.
- Place cookies 2 inches apart on the prepared baking sheets to allow the edges to crisp up beautifully.
- Bake for 10-12 minutes, until the edges turn a delicate golden brown but the centers remain soft. Remove promptly and cool completely on wire racks.
- Once cooled, get ready to showcase your sugar artistry with seamless icing and creative piping techniques.
Techniques for Achieving Crisp Edges and Seamless Icing
Locking in crisp edges while keeping interiors soft begins with dough temperature and placement. Chilled dough retains shape, and spacing ensures the edges don’t merge. After baking, allow cookies to cool completely before icing-a warm surface will cause runny lines. For icing, use royal icing mixed to a flood consistency-thin enough to flow but thick enough to hold shape.Outline your cookie edges first, then flood with icing using a small piping bag or squeeze bottle. Use a toothpick or a scribe tool to gently coax icing into corners, avoiding ugly gaps.
Creative Piping Tips to Elevate Your Cookie Designs
Mastering the art of piping is like wielding a painter’s brush. For delicate details, use a piping bag fitted with a #1 or #2 round tip. Practise steady pressure for smooth lines and gentle flicks for floral accents. Layer colors to add depth-allow each layer to dry before adding another. For texture,try dotting,feathering,or brushing effects with a damp brush. Edible markers offer another dimension for fine detailing and lettering. Don’t forget to experiment with gradients by blending colors just before piping for mesmerizing ombré effects.
Choosing the Right Tools and Color Palettes for Stunning Sugar Art
Equipping yourself with the right tools propels sugar cookie decorating from hobby to artistry.Opt for quality piping bags, couplers, and a range of decorating tips (round, leaf, star). Silicone mats and flexible bench scrapers aid rolling and transferring fragile dough shapes. For colors, consider gel-based food coloring for vibrant hues without thinning your icing. Seasonal palettes like soft pastels for spring, bold primaries for holidays, or metallic golds and silvers for elegant finishes elevate presentation.Keep a palette nearby to harmonize and balance contrasts that make your cookies visually pop.
Tips for Success
- Room temperature ingredients ensure even creaming and smooth dough.
- Don’t overbake. Cookies continue cooking as they cool; pull just as edges begin to brown.
- Use aged royal icing or prepare it a day ahead to improve workability.
- Store iced cookies in an airtight container with parchment sheets between layers to preserve crispness.
- For gluten-free options, swap all-purpose flour with a 1:1 gluten-free baking flour blend that includes xanthan gum.
- Watch humidity on decorating day as it affects icing drying times.
Serving Suggestions
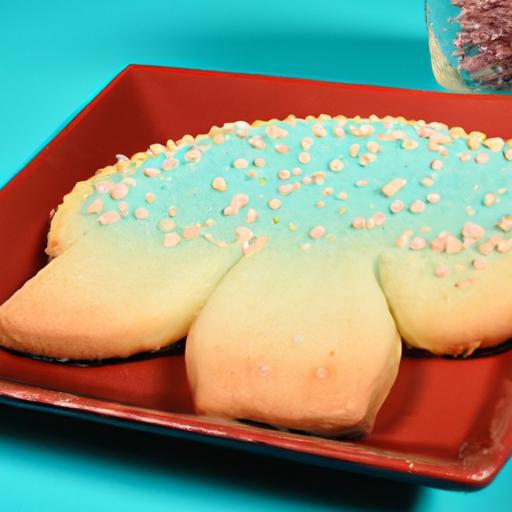
Arrange your decorated cookies on a lovely tiered platter or craft a vibrant cookie bouquet wrapped in clear cellophane with seasonal ribbon. Pair with a fragrant tea,hot cocoa,or sparkling cider to balance sweetness. Garnish with edible glitter, tiny sugar pearls, or fresh herbs like rosemary sprigs for an elegant contrast. These cookies also make perfect gifts when boxed with care, adding handwritten notes or mini cookie cutters to delight loved ones.
| Nutritional Info (per cookie) | Calories | Protein | Carbs | Fat |
|---|---|---|---|---|
| Soft Sugar Cookie | 120 | 1.5g | 18g | 5g |
Capture your Sweet Artistry: Mastering the Magic of Sugar Cookie Decorating by visiting our detailed guide on royal icing techniques and learn more about food coloring from the experts at food Network.

Q&A
Q&A: Sweet Artistry – Mastering the Magic of Sugar Cookie Decorating
Q1: What makes sugar cookie decorating an art form rather than just baking?
A1: Sugar cookie decorating transforms a simple treat into a canvas of creativity. It’s where precision meets playfulness-each sprinkle,swirl,and stroke adds personality and charm,turning edible dough into tiny masterpieces that delight both the eyes and the palate.
Q2: What are the essential tools every sugar cookie decorating artist should have?
A2: To channel your inner sugar artisan,start with piping bags and a variety of tips for detailed icing work,offset spatulas for smooth icing layers,food coloring gels for vibrant hues,and fine brushes for artistic touches. Don’t forget a sturdy rolling pin and cookie cutters in your favorite shapes to set the foundation.
Q3: How do you achieve the perfect sugar cookie base for decorating?
A3: The secret lies in a balanced dough-soft enough to bake into tender cookies but firm enough to hold shape. Chill your dough thoroughly before rolling; this prevents spreading. Bake until just golden at the edges, and cool completely. Smooth, flat tops are your best canvases!
Q4: can you explain the magic behind royal icing and its role in decorating?
A4: Royal icing is the alchemist’s potion of cookie decorating. Made from egg whites (or meringue powder), powdered sugar, and a splash of water, it dries to a firm, glossy finish perfect for intricate designs. By adjusting its consistency, you can flood a cookie with a smooth surface or pipe delicate details that stand proud.
Q5: What are some beginner-friendly techniques to start decorating sugar cookies?
A5: Begin with simple outlines and flooding-thin icing fills in shapes neatly. Practice the “wet-on-wet” technique by adding dots or patterns onto wet icing to create marbled or whimsical designs. Stenciling and the sprinkle drop are also fun ways to add flair without intricate piping.
Q6: How can you elevate sugar cookie decorating to a professional level?
A6: Mastery comes with patience and practice. Experiment with layering colors,mastering brush embroidery,or adding texture with embossing tools. Study color theory to create harmonious palettes, and don’t shy away from mixing mediums like edible glitter and paints for that luxe finish.
Q7: What tips do you have for preserving decorated sugar cookies for gifting or events?
A7: Allow royal icing to dry completely-typically 12 hours at room temperature-to avoid smudging. store cookies in airtight containers, separated by parchment paper to keep designs pristine. For longer freshness, keep them in a cool, dry place, but beware of humidity which can soften the icing.
Q8: how does sugar cookie decorating foster creativity and joy?
A8: Every cookie is a blank page inviting creativity. Whether crafting seasonal motifs or personalized messages, decorating feeds our desire to create and share sweetness in both flavor and form. It’s a joyful blend of art, fun, and deliciousness where mistakes become happy little surprises.
Q9: Any insider secrets to overcome common decorating challenges?
A9: If your icing is too runny, add powdered sugar a little at a time; too thick, add tiny drops of water. Practice steady, even pressure when piping.When layering colors, let each layer dry fully to prevent unwanted blending. And remember-a steady hand often comes from relaxed wrists (and maybe a cup of tea).
Q10: Where can aspiring sugar artists find inspiration and community?
A10: Dive into social media platforms like Instagram and Pinterest where artists share dazzling creations daily. Join decorating workshops or online forums to exchange tips and celebrate successes. Books and YouTube tutorials offer step-by-step magic, guiding your journey from beginner to sugar sorcerer.
Mastering sugar cookie decorating is a sweet adventure where creativity and technique combine to create edible joy. Ready your icing bags-it’s time to turn sugar into art!
Concluding Remarks
As you embark on your own sweet artistry journey, remember that mastering the magic of sugar cookie decorating is as much about creativity and patience as it is about technique. each stroke of icing, every sprinkle placed, and every color blended brings your edible canvas to life, turning simple cookies into delightful works of art. Whether you’re crafting charming shapes for a festive occasion or experimenting with new designs, the process itself is a festivity of imagination and joy.So gather your piping bags and palettes, embrace the learning curves, and let your sugar cookies become the sweetest showcase of your artistic spirit. After all, in the world of sugar cookie decorating, the magic truly lies in your hands.